If you’ve ever ordered acrylic clips from us here at [your company name removed], you know they’re the kind of simple, versatile accessories that hold everything from office paper stacks to recipe cards at the kitchen counter. But as a supplier who’s worked with thousands of clients—from small café owners and stationery brands to home organizers and event planners—I’ll admit: most people see acrylic clips as just a functional tool, not a blank canvas for creativity. Over the past five years, I’ve helped dozens of customers turn basic clear acrylic clips into unique, brand-aligned pieces that sell better, work harder, and add personality to every space. Today, I’m breaking down how to decorate acrylic clips properly—no fancy art degree required, and all methods are tested to keep clips durable, functional, and true to their core purpose. Acrylic Clip
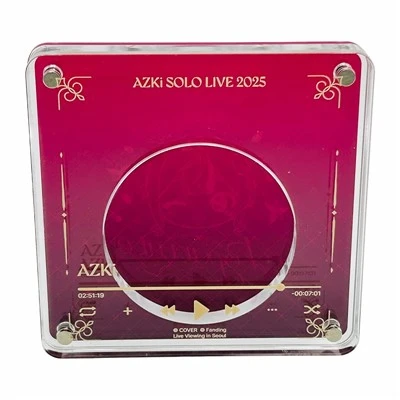
First, let’s start with the basics: why decorate acrylic clips in the first place? For small business owners, custom-decorated clips are a low-cost, high-impact way to build brand recognition. A café can add their logo to side-by-side clips for menu boards, making their brand visible every time a customer glances at a daily special. Stationery brands can use pastel-colored acrylic clips with hand-drawn patterns to stand out from generic plastic clips on store shelves. Even home users love custom clips: decorate them to match a kid’s bedroom theme, or use them to mark important documents like passports or medical records with a subtle, personal design. The key here is that acrylic’s smooth, non-porous surface is actually perfect for decoration—unlike fabric or paper, it won’t absorb materials, so designs stay crisp and long-lasting.
Before we jump into specific techniques, let’s talk about prep work that will make all your designs look better and last longer. This is a step I stress to every client because skipping it is the #1 reason custom acrylic clips peel, smudge, or fade within a few weeks. First, sort your acrylic clips by size and type: we supply clips in tiny 1-inch sizes for keychains, medium 2-inch sizes for office use, and larger 3-inch sizes for event signage, and each has a slightly different surface texture (thicker clips have a more matte back, while thin clear clips have a glossy front). Next, clean every clip thoroughly with rubbing alcohol and a lint-free cloth. Oils from fingerprints, even after just handling, will prevent adhesive, paint, or vinyl from sticking properly. Let the clips air dry completely—10 to 15 minutes is enough, and don’t touch them with bare hands after cleaning, or you’ll transfer new oil. If you’re working with a batch of clips for a project, lay them out on a parchment paper-lined tray so they don’t stick together while you work.
Now, let’s go through the most popular decorating methods, ranked by ease, durability, and cost, so you can pick what fits your skill level and project needs.
First up: Vinyl Stickers and Decals. This is my go-to method for small business clients or bulk orders, because it’s fast, affordable, and produces crisp, professional results. Vinyl is a thin, adhesive-backed plastic that comes in every color and finish—matte, glossy, metallic, even glow-in-the-dark—and it’s designed to stick to smooth surfaces like acrylic for years. It’s also perfect for detailed logos, text, or patterns that would be hard to paint by hand. Here’s how to do it right: after cleaning your clips, measure the area you want to put the decal on—most people choose the flat back of the clip, since the front is usually where the metal spring mechanism sits. We always recommend leaving 1/8 inch of space around the edge of the flat area so the vinyl doesn’t overlap with the curved sides, which can cause bubbling. Cut your vinyl to size (or use a custom cutter if you have a small business), then use a transfer tape to apply the decal. Press firmly with a credit card or squeegee to get rid of all air bubbles—even tiny bubbles under vinyl will look messy and can lift over time. If you’re new to applying vinyl, test a scrap of acrylic first (we always send free sample clips with bulk orders, perfect for this!) to practice getting the pressure right. For extra durability, you can add a clear coat of matte or glossy sealant over the vinyl once it’s applied, though most high-quality vinyl will stick just fine without it, especially if used indoors. The only caveat here: don’t use vinyl on clips that will be exposed to direct sunlight or extreme heat (like clips used for outdoor patio signage), as UV rays can make the adhesive break down over time.
Second method: Hand-Painted Designs. If you want a more personalized, handmade look for a small batch of clips (like a wedding favor set or holiday-themed clip collection), hand-painting is the way to go. Acrylic’s smooth surface works surprisingly well with the right types of paint, but regular craft paint will chip easily, so you need to use paint formulated for plastic or acrylic surfaces. I recommend acrylic enamel paint—it’s flexible, adheres well, and dries to a hard, durable finish that won’t scratch if you seal it. Here’s how to paint acrylic clips without mistakes: use a fine-tip paintbrush (size 0 or 1 works best for small details) and thin the paint slightly with a bit of water or paint medium so it flows evenly, instead of being too thick and clumpy. Paint thin, even coats—two light coats are better than one heavy coat, which will run and take longer to dry. Let each coat dry completely (20 to 30 minutes) before adding the next. If you’re painting small details like polka dots or tiny hearts, use a toothpick or the tip of a paintbrush to dot the paint on, rather than a regular brush tip. Once your design is fully dry, you need to seal it with a clear acrylic sealer—spray sealer is easiest for large batches, but a brush-on sealer works for small, detailed clips. Spray the sealer in a well-ventilated area, holding the can 8 to 10 inches away from the clips, using light, sweeping motions to avoid drips. Let the sealer cure for 24 hours before using or handling the clips. The best part about hand-painted clips is that you can customize them completely—for a children’s craft project, let them paint their own clips with favorite characters, or for a small business, add watercolor-style patterns that feel soft and approachable, different from the crisp vinyl look.
Third method: Heat Transfer Vinyl (HTV) and Embossing. For a more long-lasting, washable design if your clips are going to be used for accessories (like keychains or bag charms), HTV is a great step up from regular vinyl. HTV is designed to be applied with heat, so it adheres to the acrylic surface permanently, even with regular use. It’s also great for textured or matte acrylic clips, which regular vinyl can sometimes peel off of. To use HTV, you’ll need a heat press or an iron set to low heat (around 275 degrees Fahrenheit—always check your HTV brand’s specific instructions). Cut your design out of HTV, weed the excess material, then place it on the flat back of the clip, cover it with a thin cloth to protect the paint from the iron, and press firmly for 10 to 15 seconds. Let it cool for a minute, then peel off the carrier sheet. The key here is not to use too much heat, which can warp the thin acrylic clips we supply—thicker clips can handle more heat, but it’s better to err on the side of lower heat. If you want to add texture, embossing powder is another fun option. After painting a design with clear or colored paint, while it’s still wet, sprinkle embossing powder over it, tap off the excess, and use a heat tool to melt the powder into a raised, textured design that feels nice to touch. This works great for logos or monograms on larger clips.
Fourth method: Epoxy Resin Coating. If you want a high-gloss, glass-like finish that makes designs pop, epoxy resin is perfect for clips that will be on display (like wedding favors or retail display pieces). Epoxy creates a smooth, hard layer that protects designs from scratches, UV damage, and water, making it ideal for clips used outdoors or in high-traffic areas. The only thing to note here is that epoxy requires precise mixing and a level workspace to avoid bubbles or uneven finishes. First, decorate your clips with paint or vinyl, let them dry completely, then place them on a level surface lined with parchment paper. Mix your epoxy resin according to the brand’s instructions (always follow exact ratios—too much or too little hardener will cause it to not cure properly), then pour a thin, even layer over the flat back of the clip. Use a toothpick to pop any bubbles that rise to the surface, then let it cure for 24 to 48 hours. The result is a glossy, durable finish that looks like a tiny piece of jewelry, perfect for special event clips. The downside is that epoxy is more expensive and more time-consuming than other methods, so it’s best for small, high-value batches, not bulk orders of hundreds of clips.
Now, let’s talk about common mistakes to avoid, based on years of working with clients and testing decorating methods: First, don’t use permanent markers for long-lasting designs. While Sharpies might work temporarily, they will smudge when exposed to moisture and fade after a few weeks of sunlight. Second, don’t skip the cleaning step. I once had a client who ordered 500 custom-printed clips, and 20% of the vinyl peeled off within a month, only to find out he skipped rubbing alcohol and just wiped the clips with a dry cloth. That mistake cost him extra time and money reordering, so always clean properly. Third, don’t overcrowd the design. Leave at least a 1/8-inch border around the edge of the clip’s flat surface, so designs don’t peel or get damaged when the clip is opened and closed. Fourth, test all methods on sample clips first. We provide free sample clips with every bulk order for exactly this reason—don’t waste time and money decorating a full batch until you know the paint or vinyl works with our specific acrylic material.
Whether you’re a small business owner looking to brand your products, a parent making custom clips for your kid’s backpack, or an event planner creating unique favors for a wedding, decorating acrylic clips is a fun, accessible way to add personalization to a simple item. Our team has worked with every kind of project, from custom logo clips for coffee shops to hand-painted holiday clips for retail stores, and we’re always happy to offer advice on what size or type of clip works best for your decorating project.

If you’re ready to start a custom acrylic clip project, or have questions about bulk orders, material options, or decorating tips for your specific needs, our team is here to help. We work with clients of all sizes, from one-off small batches to large wholesale orders, and we can connect you with the resources you need to bring your vision to life.
Laser-cut Keychains References:
- Acrylic Surface Adhesion Best Practices, Plastics Industry Association, 2022
- Customizing Plastic Accessories: Durable Decoration Methods, Stationery Trends Magazine, 2021
- Epoxy and Vinyl Applications for Small Batch Crafts, Craft & Hobby Association, 2023
- UV Resistance of Decorative Materials for Outdoor Use, Building Products Magazine, 2022
Wenzhou Qumange Craft Co., Ltd.
With abundant experience, we are one of the most professional acrylic clip manufacturers in China. Welcome to wholesale bulk customized acrylic clip at competitive price from our factory. If you have any enquiry about pricelist and free sample, please feel free to email us.
Address: Room 802, Building A1, Yuehu Light Industrial Park, Taishun County, Wenzhou City, Zhejiang Province, China
E-mail: 13806616181@139.com
WebSite: https://www.qmgcraft.com/
